Overview
New options have been introduced to Inventory Manager for configuring which fields appear in the lookups throughout the mobile app. Make the most important fields available when warehouse users are searching for sales orders, purchase orders, items, serials, lots, and more. Tailor field visibility per transaction type so that every inventory process from receiving to transferring to sales order fulfillment is faster and easier.
This feature is available as of Inventory Manager v5.15.0.
Mobile Lookup Configuration
The Mobile Lookup Configuration screen in the Inventory Manager desktop application allows configuring visible fields for the mobile app lookups. This includes core fields as well as User Defined Fields (UDFs) for each business object. These changes are global and affect all mobile users.
Setup
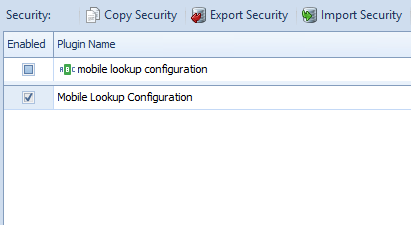
Open the Security Editor in the Inventory Manager console by going to Modules -> System -> Security Editor. Enable the Mobile Lookup Configuration screen and save. Log out and back in for changes to take effect.
Configuration
Launch the Mobile Lookup Configuration screen from the Setup tab in the ribbon.

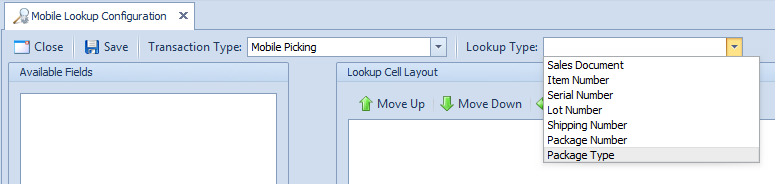
The Mobile Lookup Configuration screen provides dropdown options at the top to select the Transaction Type, such as Mobile Picking or Mobile Receiving, and the Lookup Type, such as Sales Document or Item Number. Lookup Type options change based on the selected Transaction Type.
On the left, the Available Fields section displays all fields that can be made visible for the selected Transaction Type and Lookup Type. On the right, the Lookup Cell Layout shows the current layout for the selected Transaction Type and Lookup Type. Fields can be dragged and dropped between these sections to add or remove them from the layout.
To configure a layout, select the target transaction from the Transaction Type dropdown.
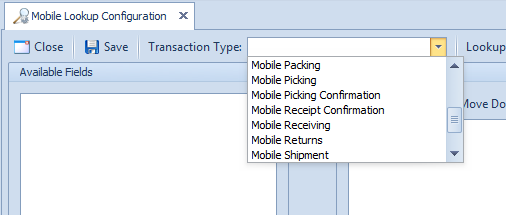
Select the target lookup from the Lookup Type dropdown. These options change based on the selected Transaction Type.
Drag fields from the left into positions in the grid to assign them to the layout. Drag fields from the grid back to the left to remove them from the layout.
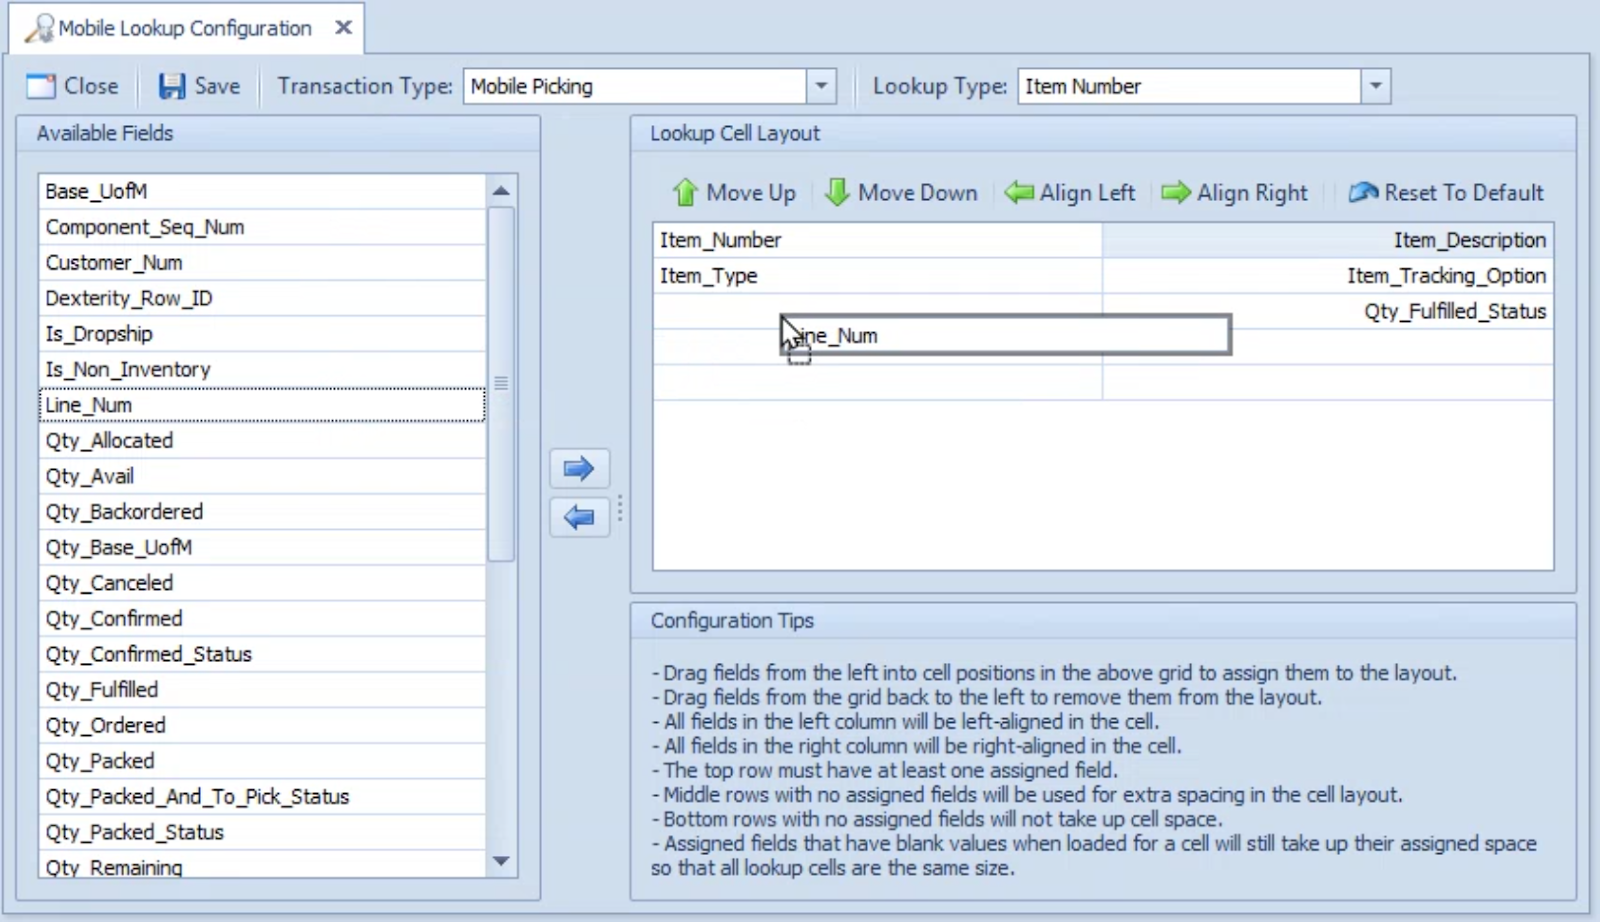
Click the Save button to save all changes.
Click the Reset To Default button to set the currently selected lookup back to its default layout.
The following transaction types support configurable lookups:
-
Assembly Entry
-
Bin Transfers
-
In-Transit Picking
-
In-Transit Receiving
-
Inventory Adjustment
-
Inventory Lookup
-
Item Label Printing
-
License Plate Maintenance
-
Mfg Transaction Entry
-
Packing
-
Picking
-
Picking Confirmation
-
Receipt Confirmation
-
Receiving
-
Returns
-
Shipment (Shipping)
-
Site Transfers
-
Stock Count Creation
-
Stock Counts
Mobile App Lookups
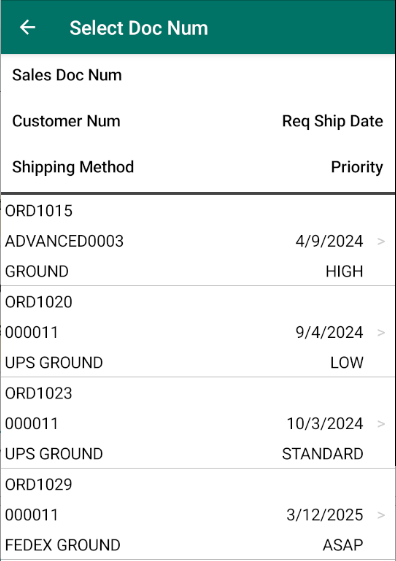
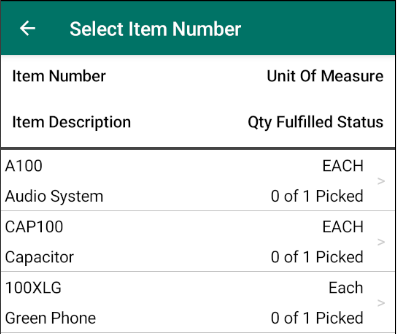
Once the layouts have been configured and saved, the mobile app lookups will display their configured fields. Launch the target transaction type and enter the target lookup. Note that you may need to enter other required information for that module before accessing the target lookup; e.g. for Picking you must select the Doc Num and then a serial-tracked Item Num before being able to enter the Serial Num lookup.
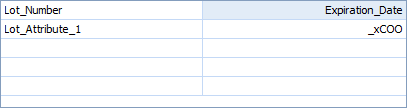
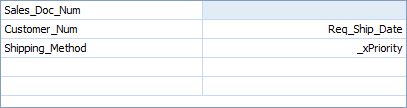
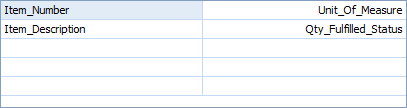
Lookups will show their fields in the configured layout, with matching position and alignment. Fields that are too long for their designated space will be truncated. Middle rows with no assigned fields will be used for extra spacing in the cell layout. Bottom rows with no assigned fields will not take up cell space. Assigned fields that have blank values when loaded will still take up their assigned space so that all lookup cells are the same size.
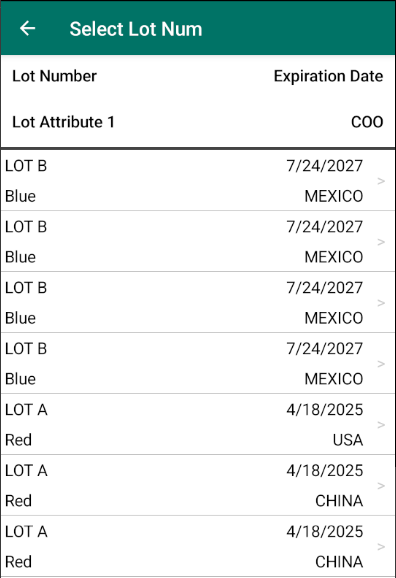
The lookup header region will show the names of all displayed fields in the same position as the cells, so that the user knows which fields are shown for that lookup. Each header field name can be tapped to sort the lookup results by that field. The first tap will sort by that field in ascending order (A-Z), the second tap will sort by that field in descending order (Z-A), and the third tap will reset to the default sort for that lookup.
Examples
Picking - Sales Document
Picking - Item Number
Picking - Serial Number
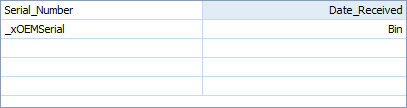

Picking - Lot Number